
Use a Shopify store that you have permission to manage. Blog publishing requires an active Founder or Multi-Brand subscription, or a supported legacy plan.
Connect the store#
- Open Brand → Social accounts.
- Select Add Social Account, then Connect Shopify blog.
- Enter the store's prefix or full
myshopify.comdomain in Store domain. Usecedar-trailorcedar-trail.myshopify.com, withouthttps://or a path. - Select Continue to Shopify and approve the store connection.
- Return to Moosen. If there are several blogs, choose the default. If there is one, Moosen selects it automatically.
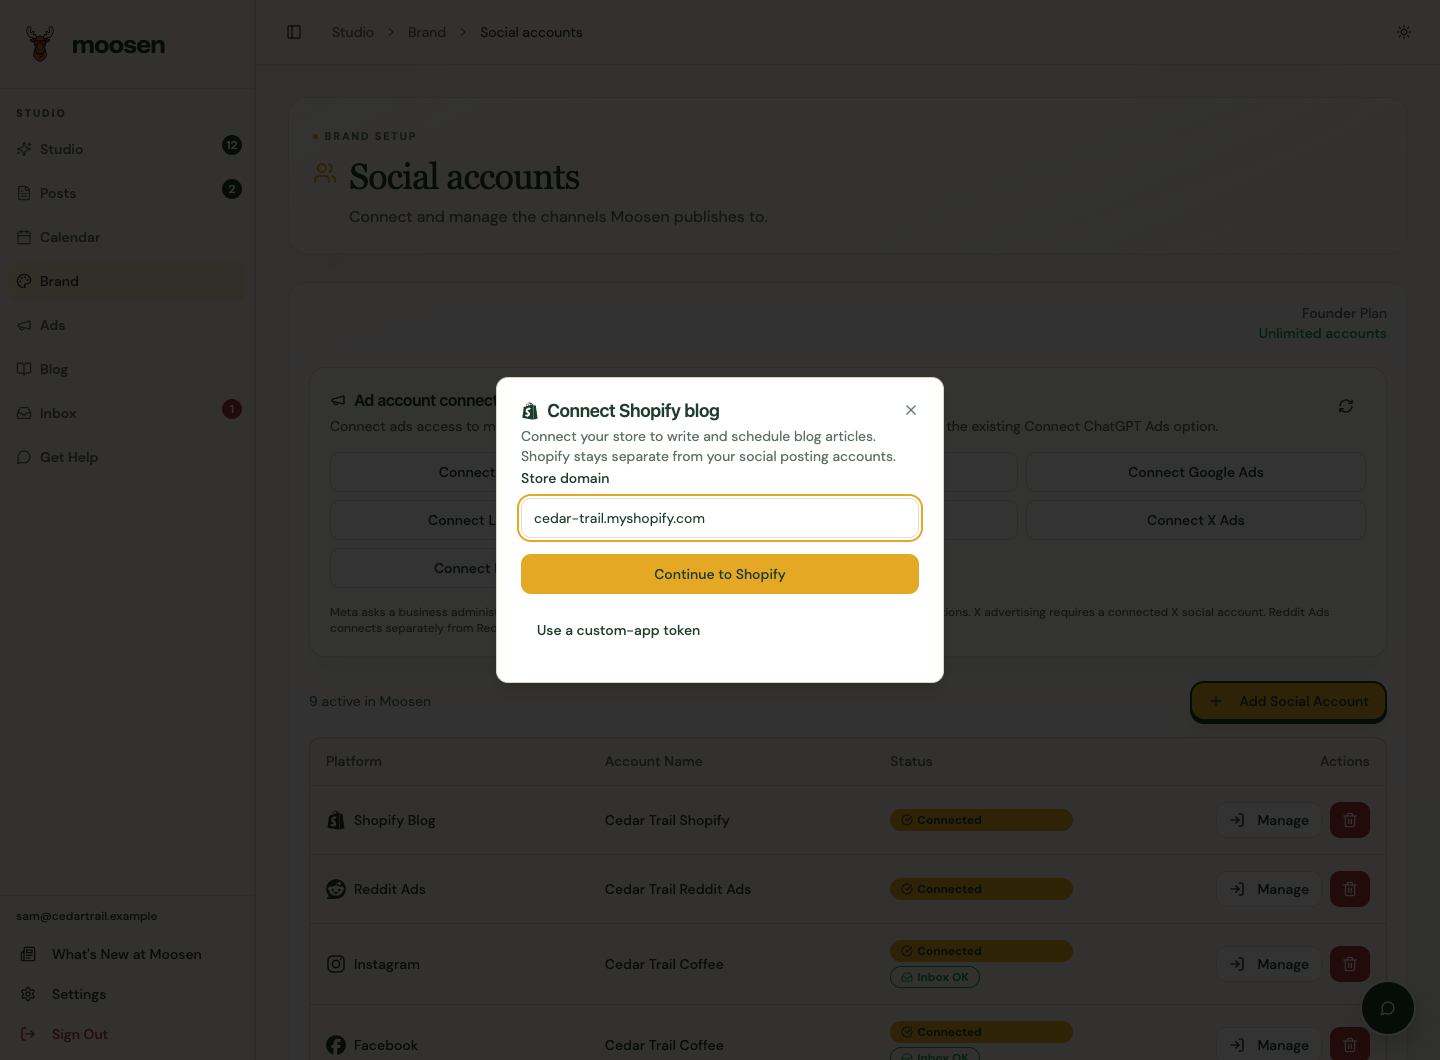 Enter the permanent store domain before continuing to Shopify. Sample data. Select image to enlarge.
A store without a blog can stay connected. Create its first blog in Manage Shopify blogs. You can choose another blog for an article before its first delivery.
Use a custom-app token#
Choose Use a custom-app token to connect with an existing Admin API access token. Enter the store domain and token, then select Connect with token. The token starts with shpat_ and needs the permissions requested by the connection, including content read and write access.
The token field is masked and clears after the request. Moosen doesn't save it in browser storage or its own database. Keep it out of screenshots and support messages.
Reconnect safely#
Open the store's Manage control in Social accounts and select Reconnect Account. Renew the connection for the intended store. This updates the existing connection and preserves its saved settings.
If permissions were removed or the app was uninstalled from Shopify, reconnect before sending another article. Connecting a store doesn't publish an article. Open Blog to prepare and review one. This workflow doesn't require a Moosen-branded Shopify App Store listing.